
How to buy and trade Ether and ERC-20 tokens using Trezor
How to buy and trade Ether and ERC-20 tokens using Trezor
The Trezor hardware wallets support Ether and all ERC-20 tokens . ERC-20 tokens are tokens built and can be used on top of the Ethereum platform (such as Binance Coin, VeChain, OmiseGo, Golem, etc.).
Receiving and sending Ether or ERC-20 tokens with your Trezor device is at present only possible via third party wallets MyEtherWallet or MyCryptoWallet .
COMMENT: Please note that when using MyEtherWallet or MyCryptoWallet with your Trezor device, your private keys will be stored only on your Trezor device (and not on mentioned platforms). When using your Trezor device with these online platforms, these platforms serve only as interface for executing transactions, but do not actually hold your Ether or ERC-20 tokens. Your Ether and ERC-20 tokens benefit therefore from the same cryptographic protection as do your other cryptocurrency that you store on the Trezor device.
The below step-by-step guides outline how you can use your Trezor device to buy and sell Ether and ERC-20 tokens, together with the following platforms:
MyEtherWallet; and
MyCrypto.
In order to make use of the below step-by-step guide, your first need to have set-up your Trezor wallet, by following the Trezor One set-up guide or the Trezor Model T set-up guide .
-
-
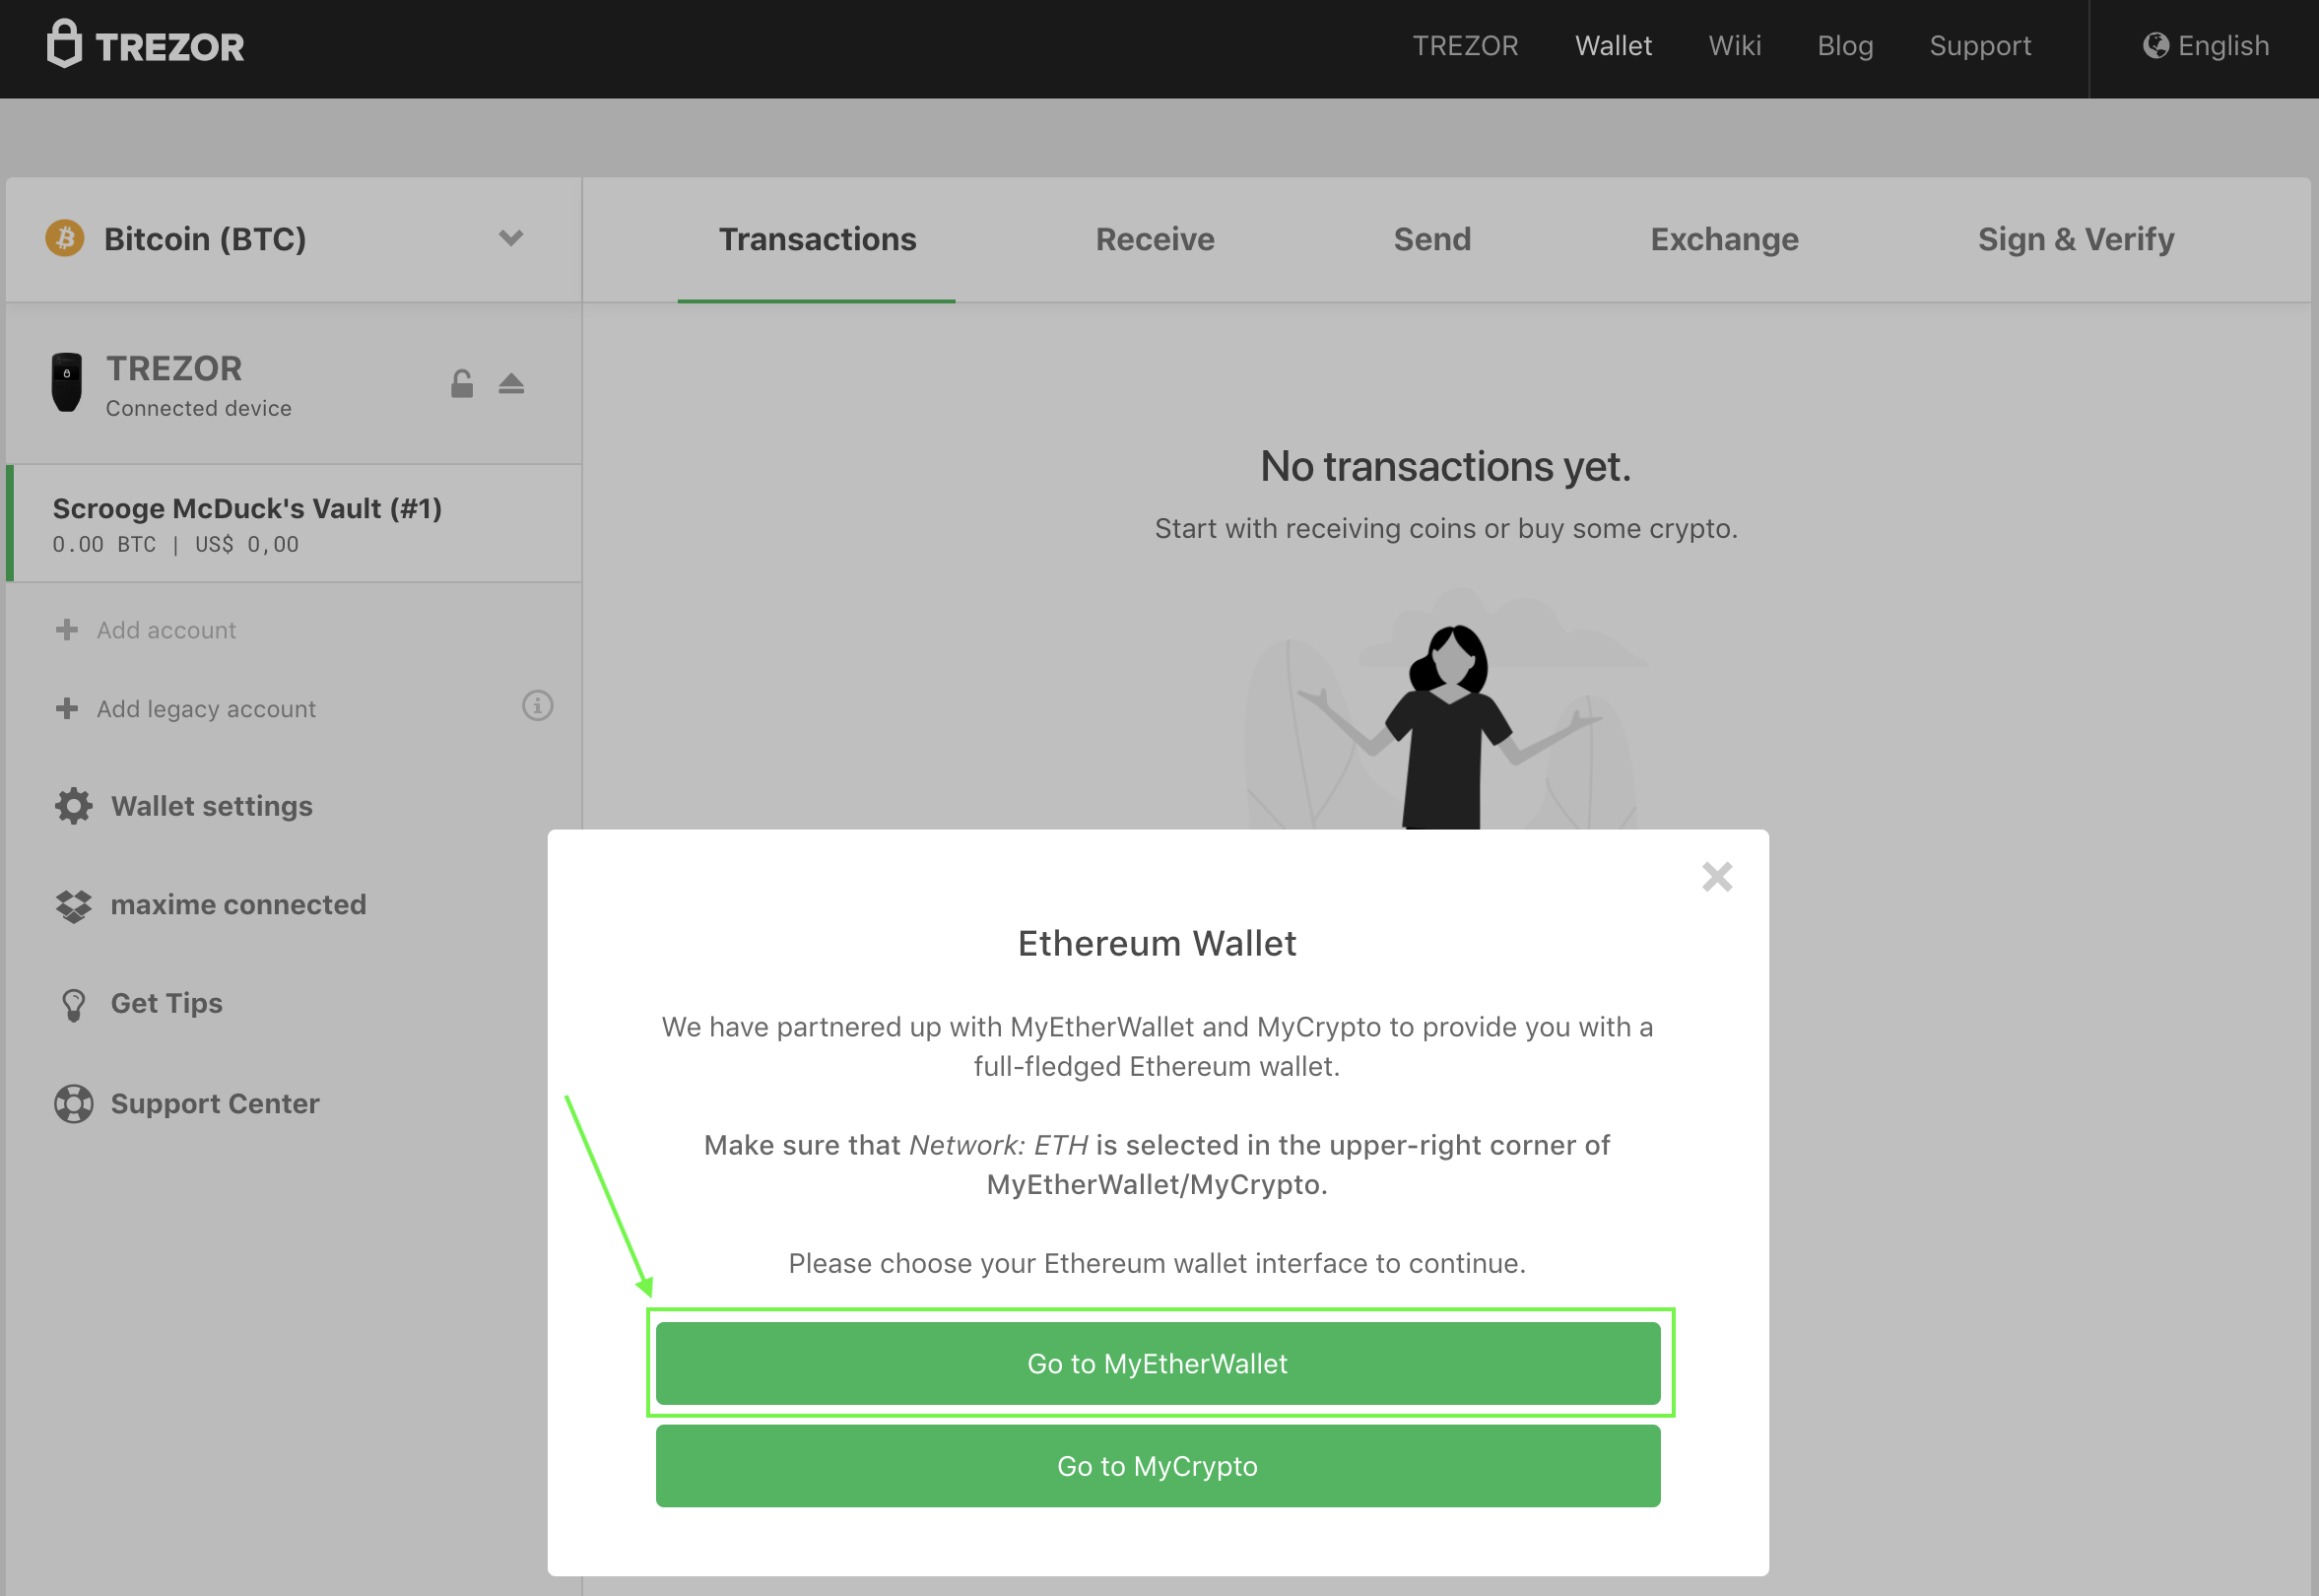
Choose the platform
-
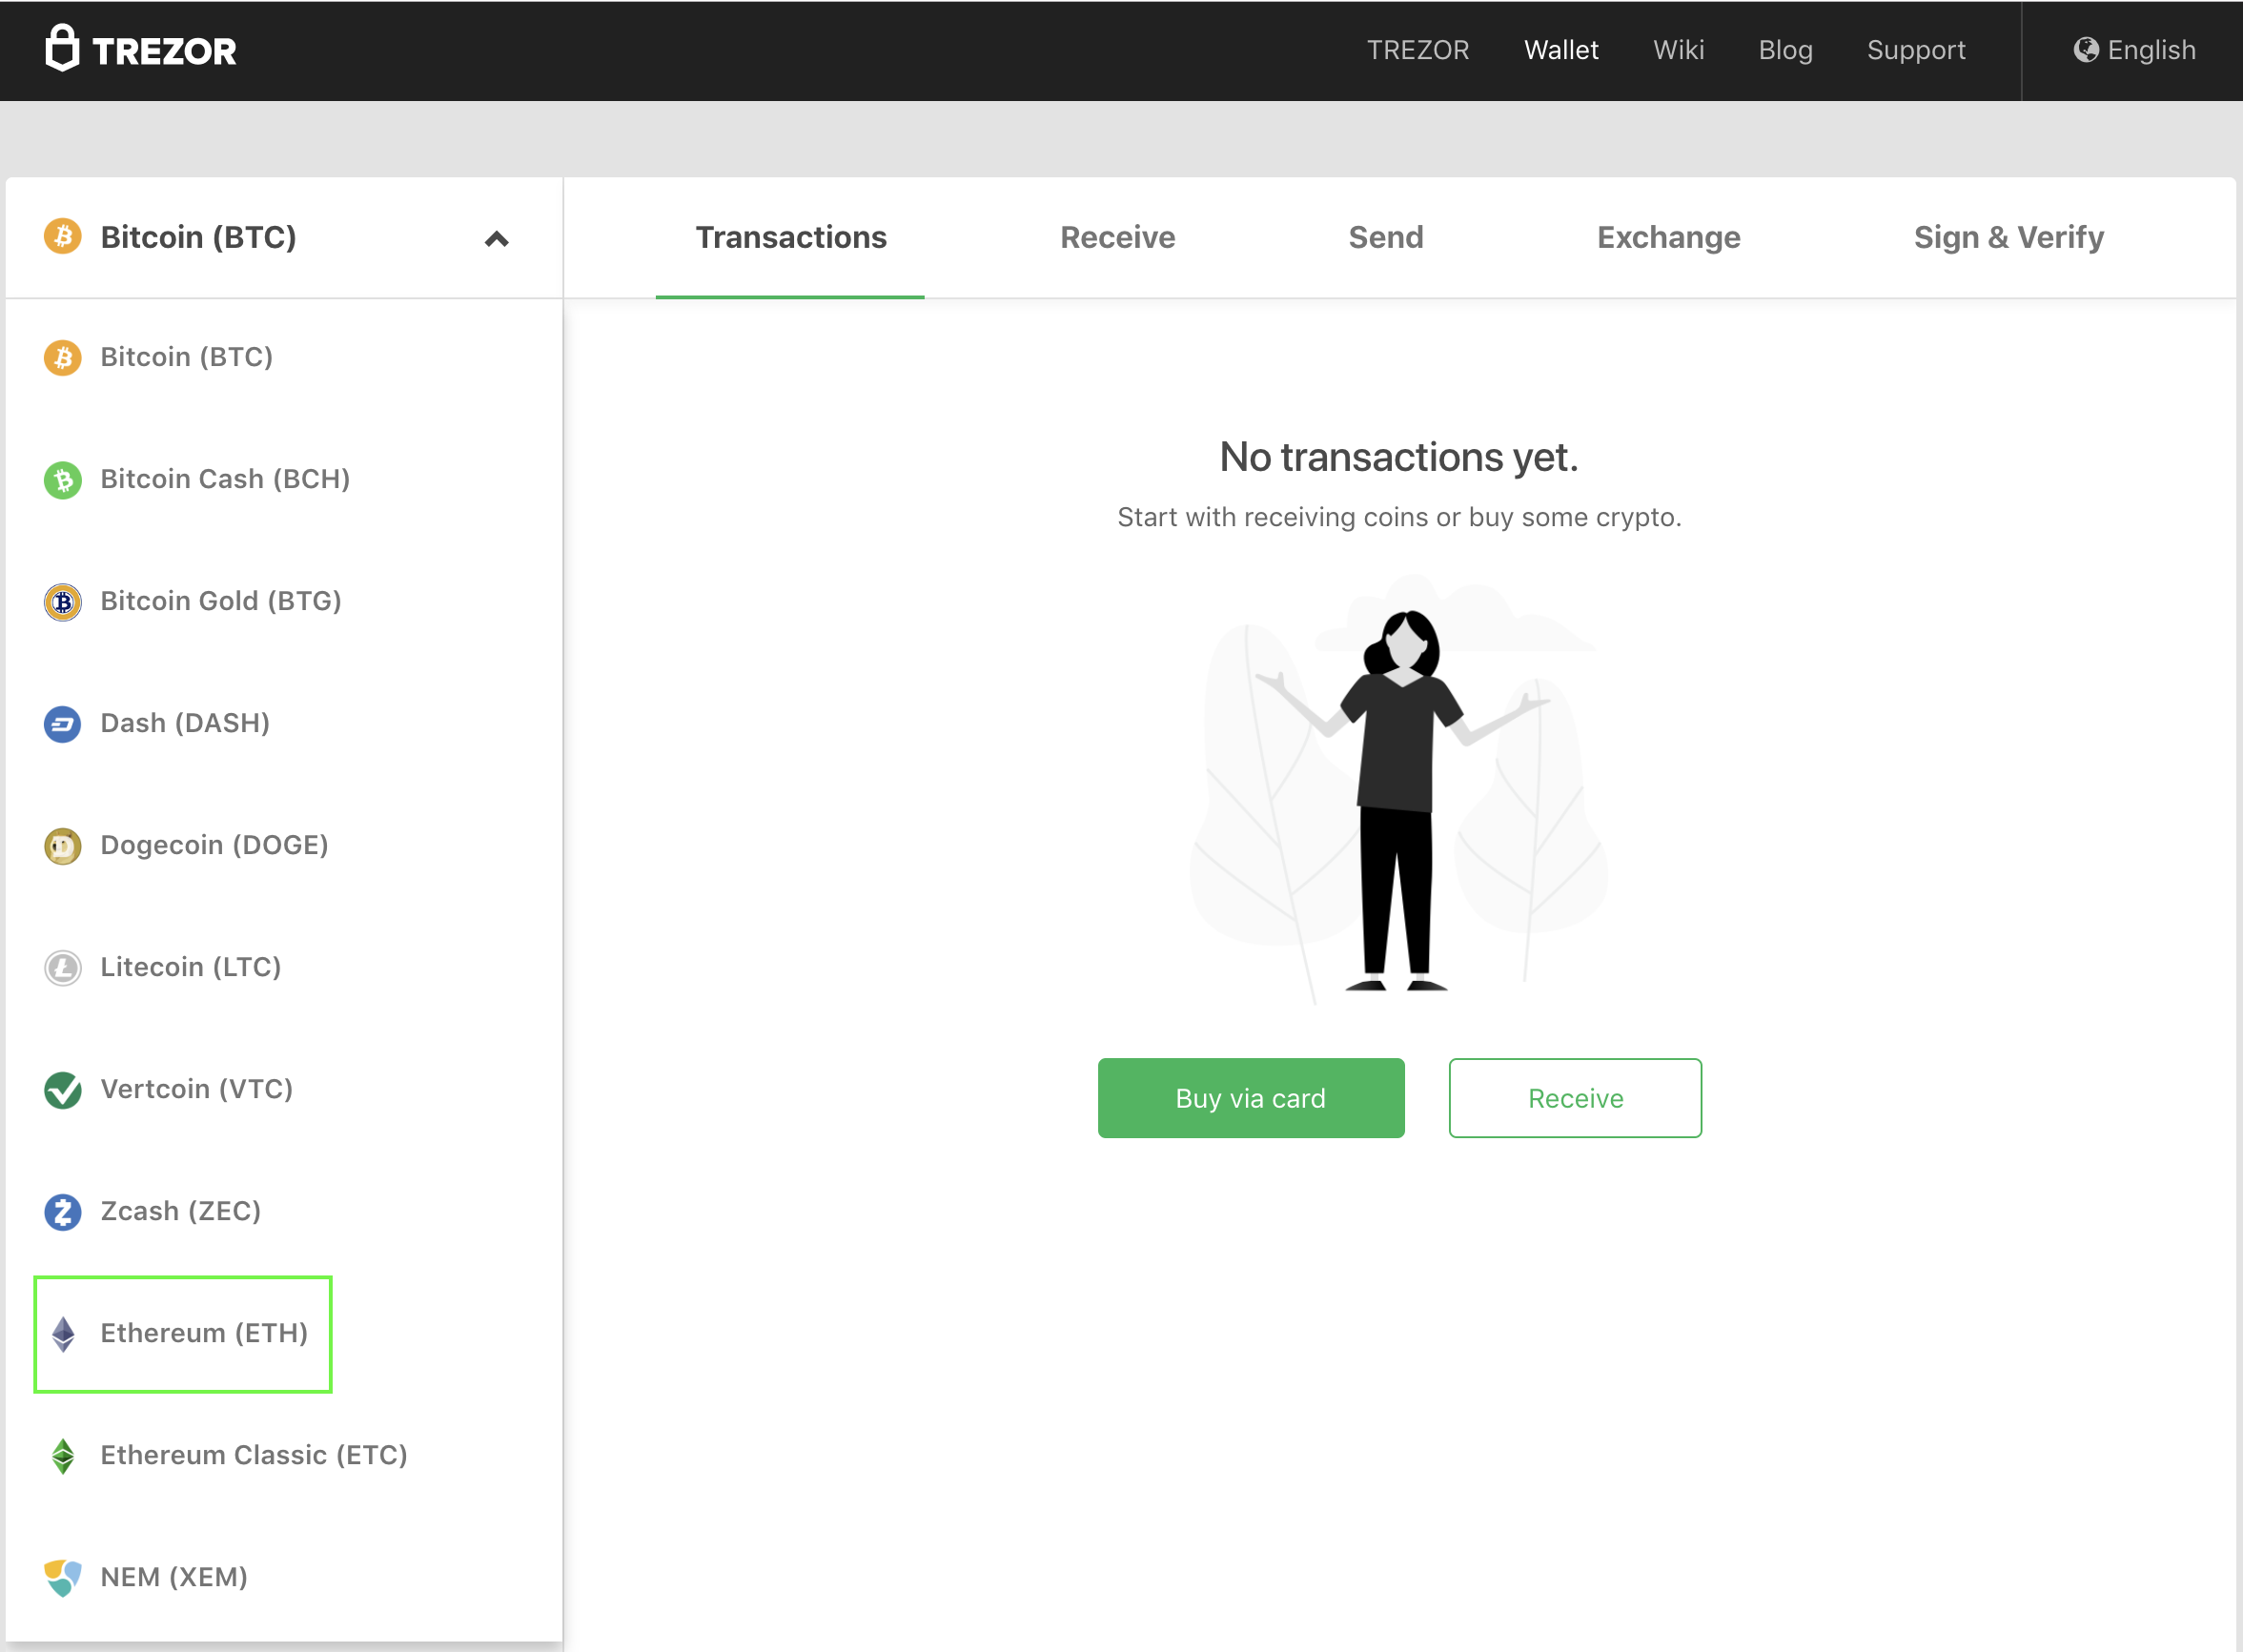
Choose the platform

-
Select ‘ETH (myetherwallet.com)’
-
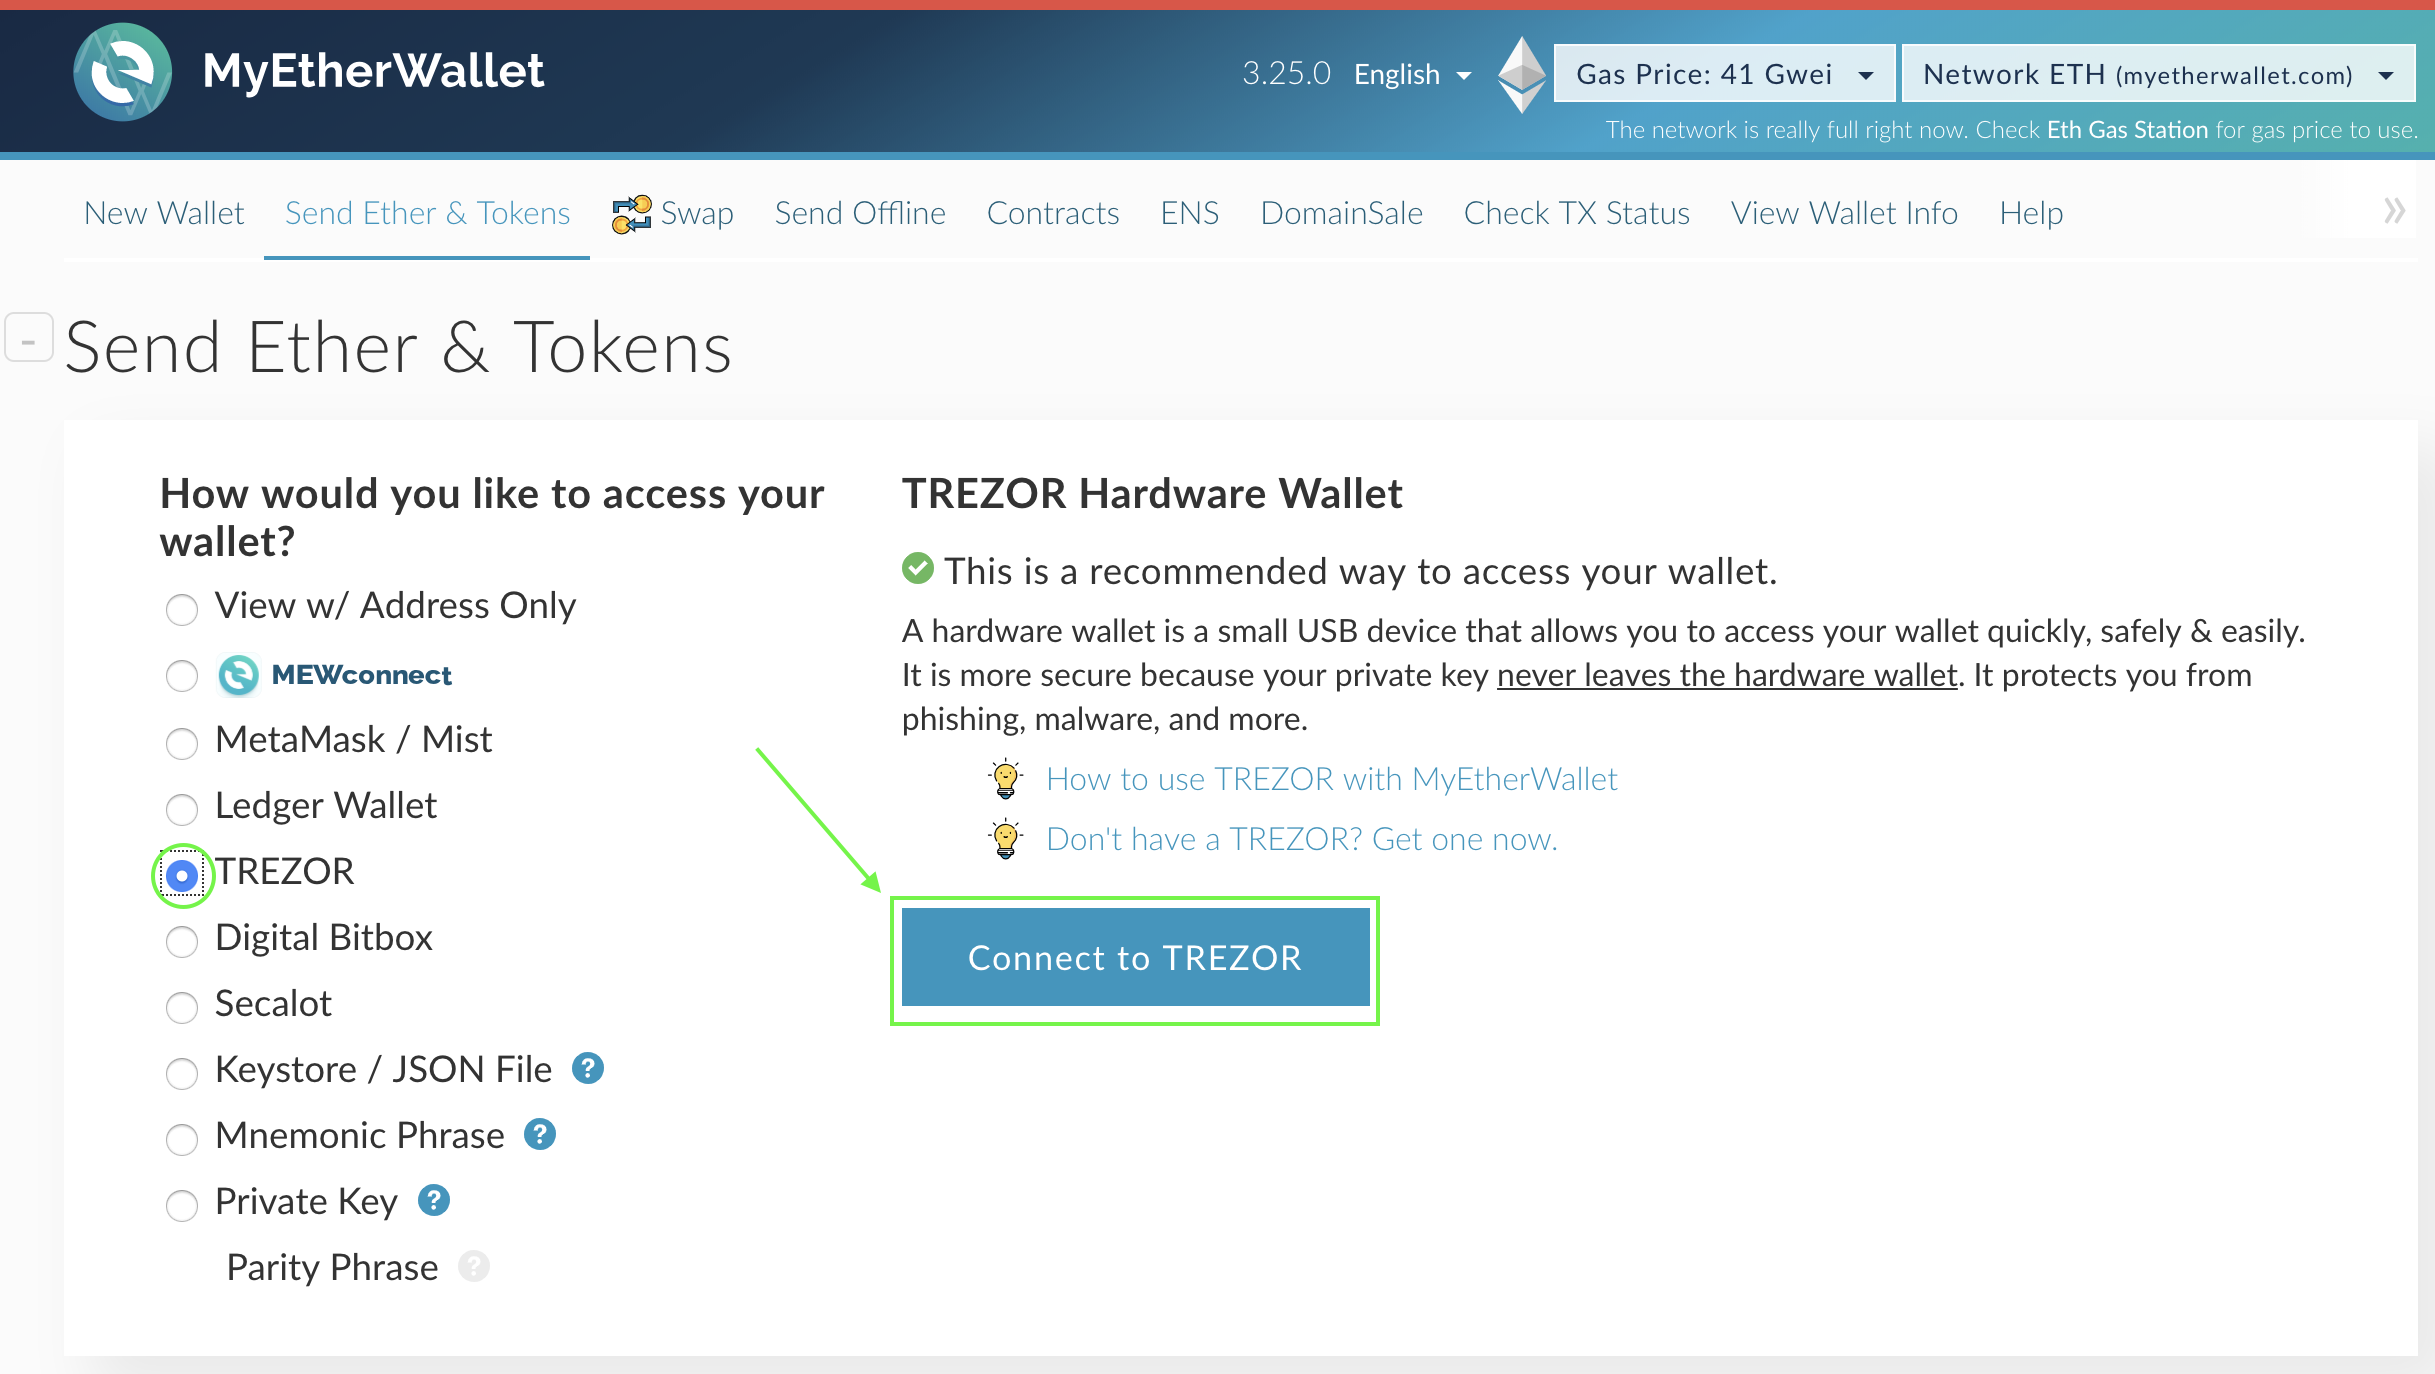
Select TREZOR

-
Read public key & Export

-
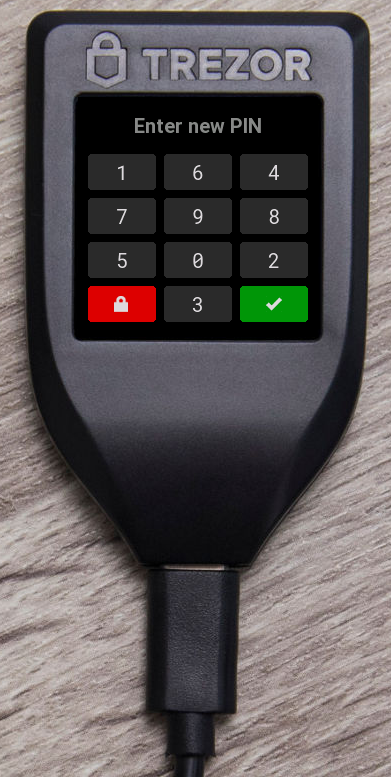
Insert PIN

-
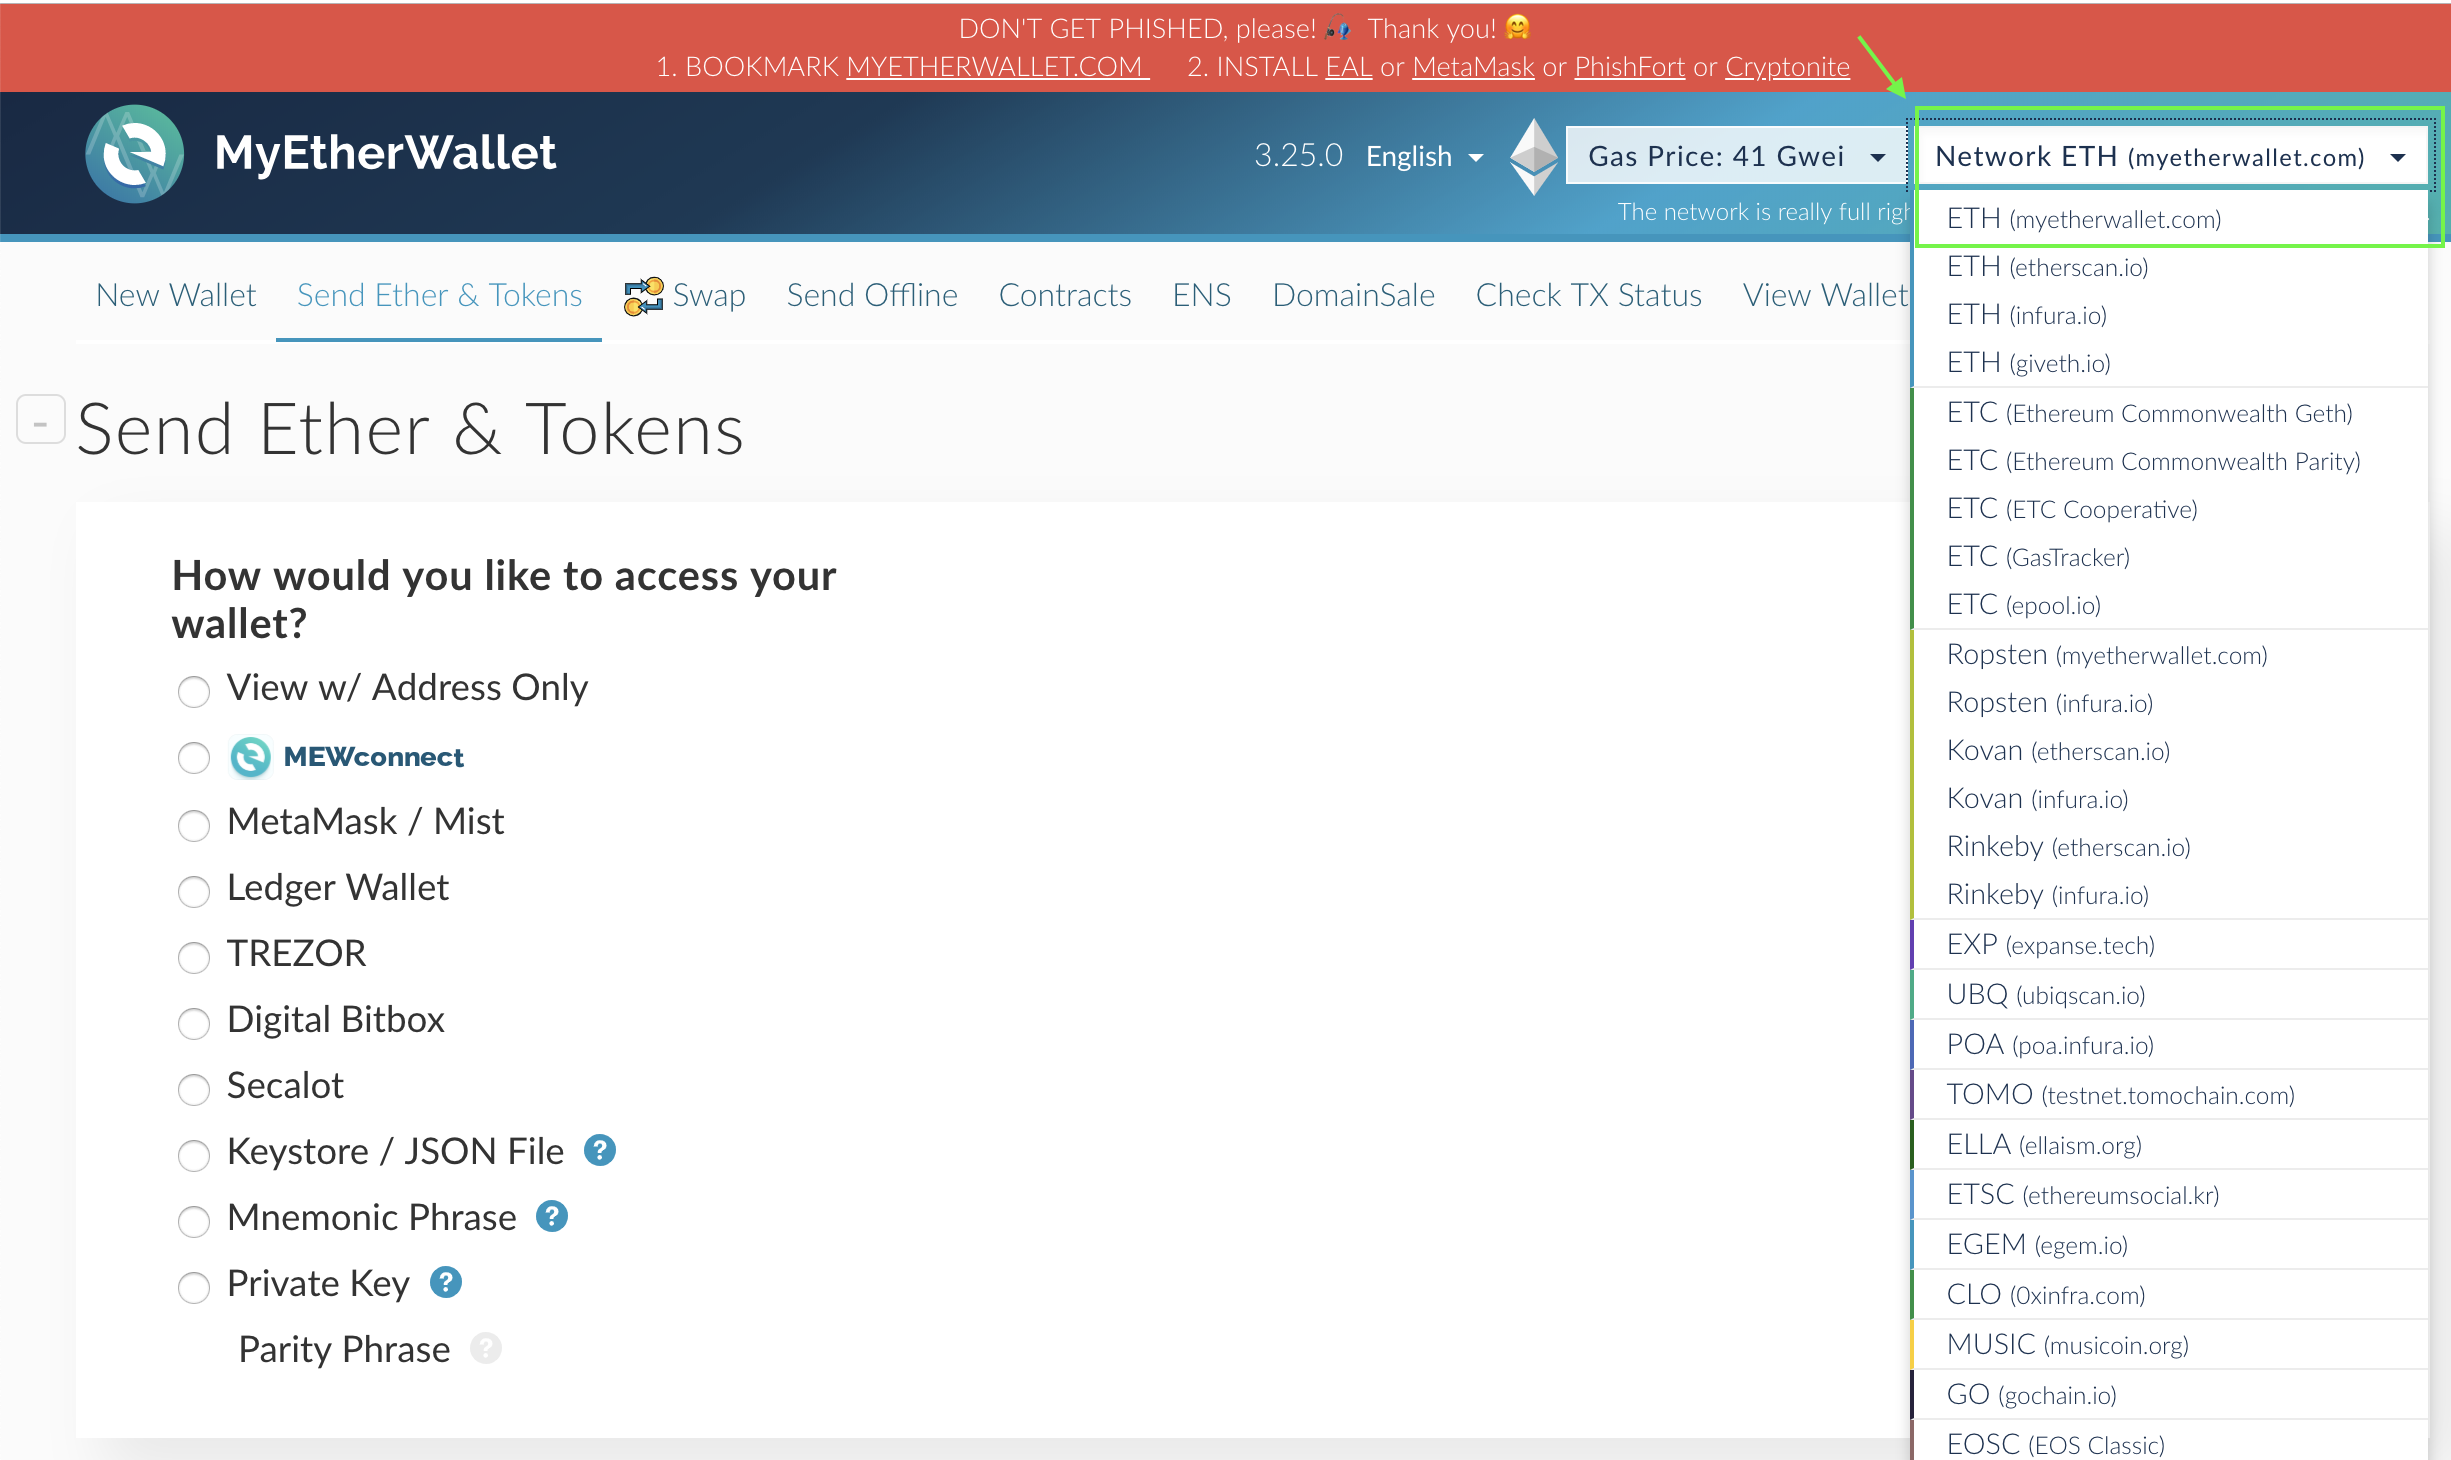
HD path derivations

-
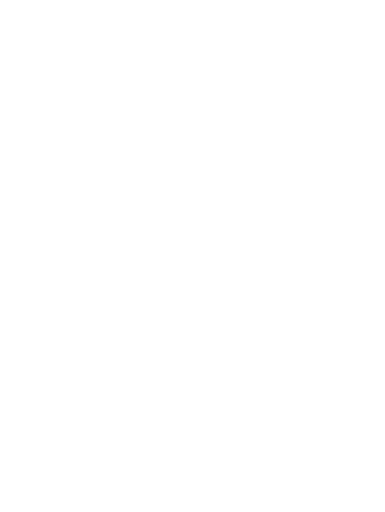
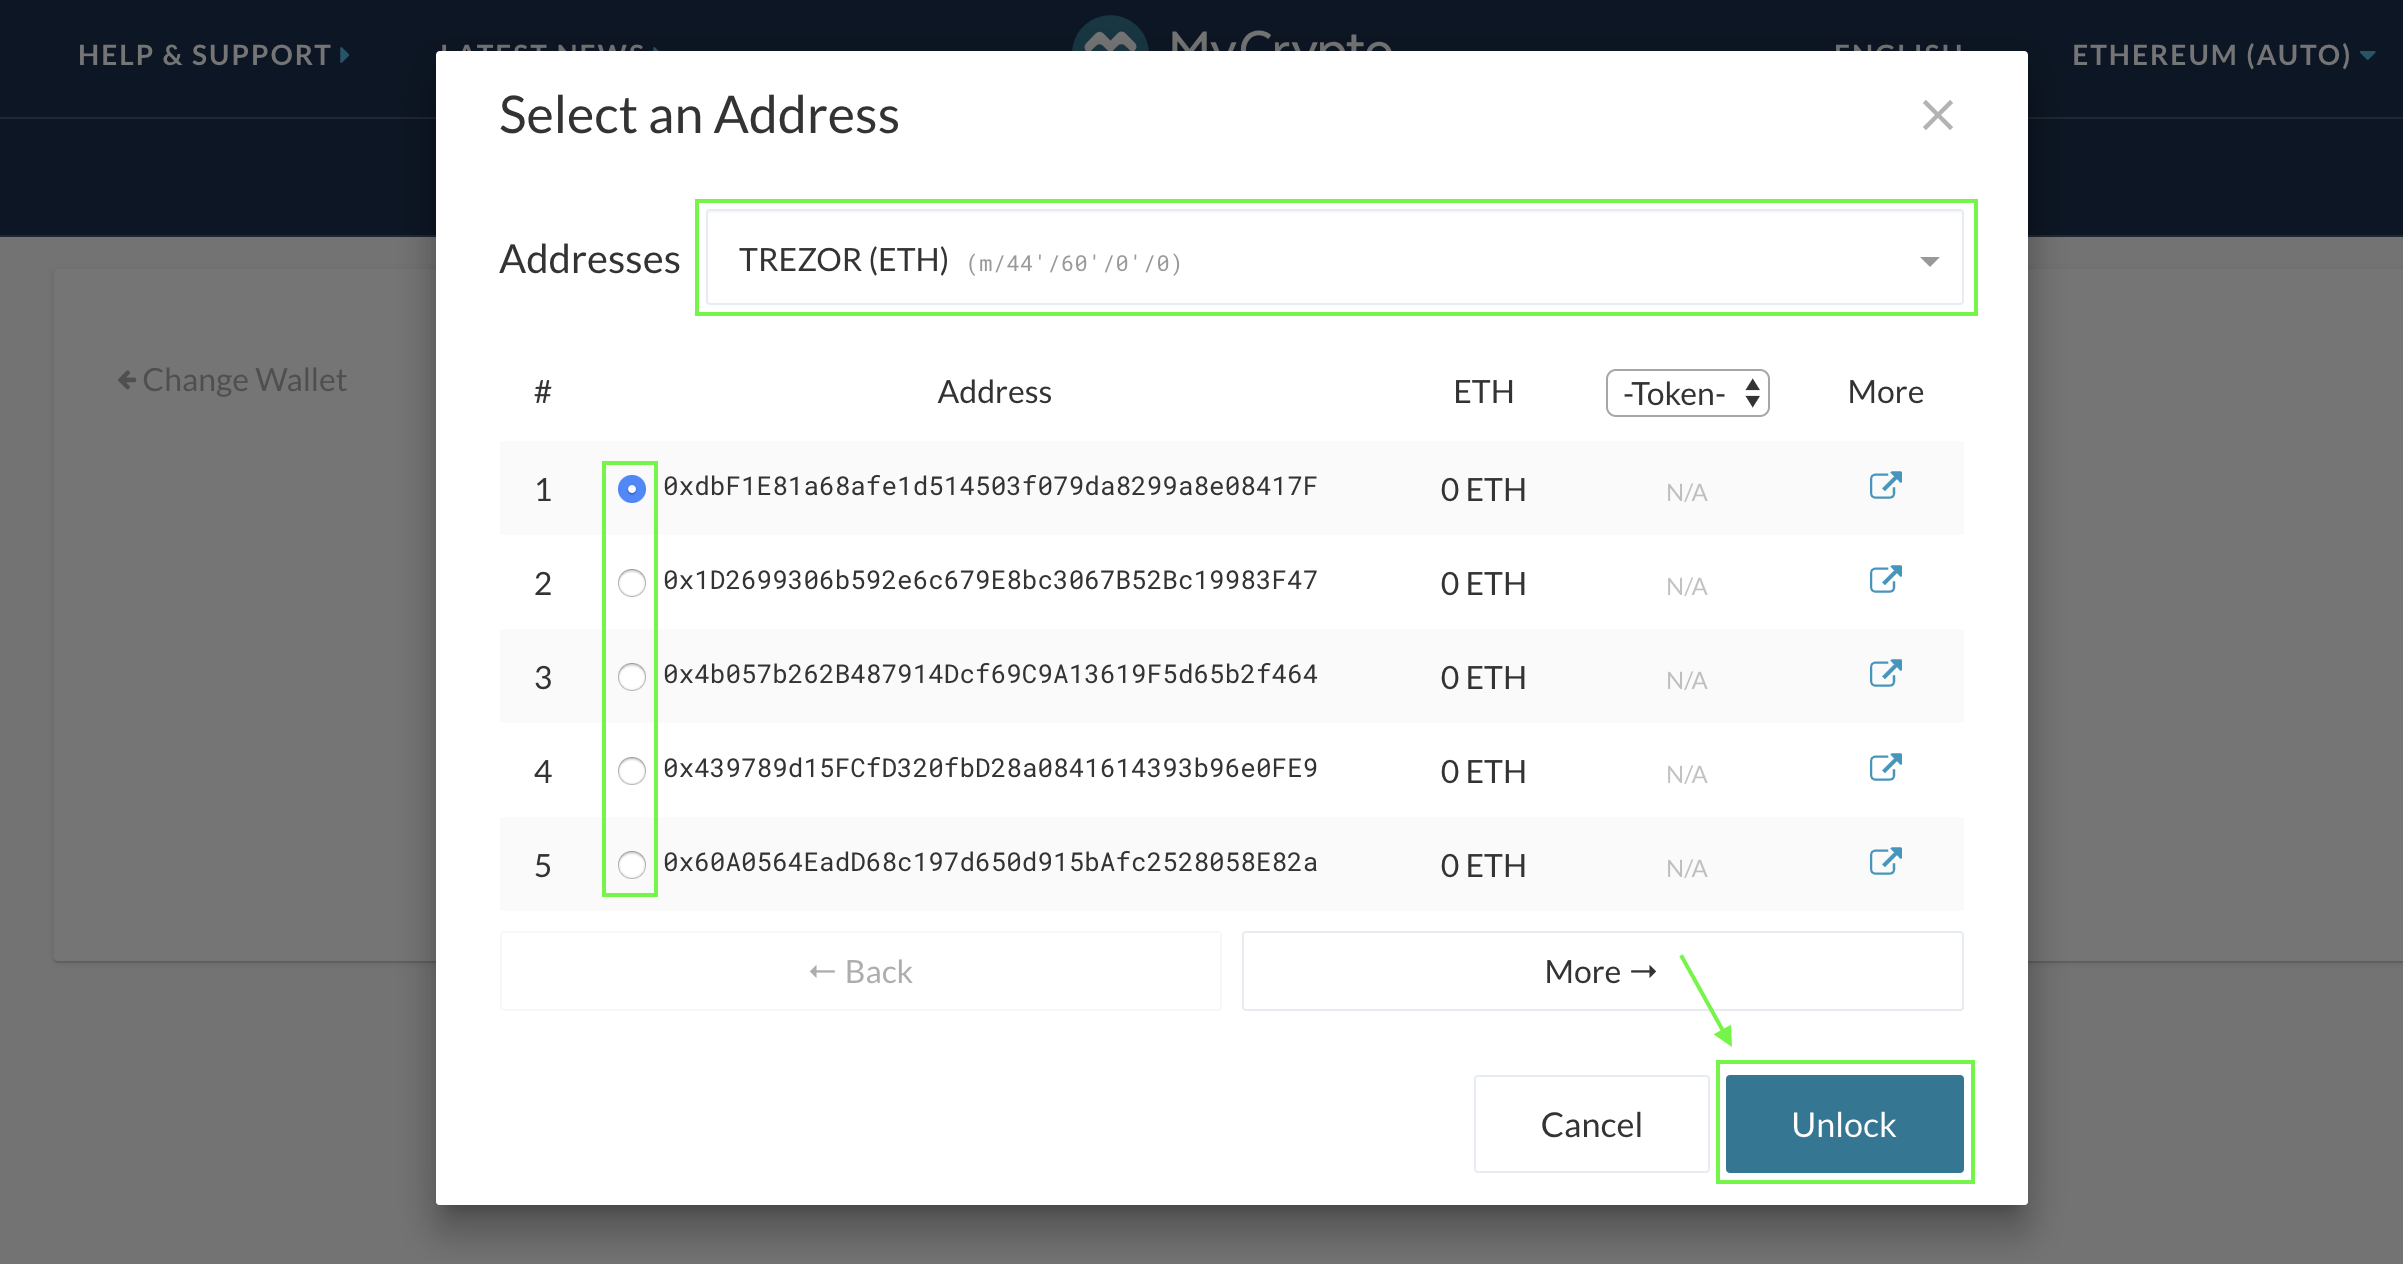
Select an address
On the bottom of the screen all created addresses and their balances are displayed. Any Ether or ERC-20 tokens that are sent to these addresses are protected by your Trezor hardware wallet.
Select an address and click on the blue button ‘Unlock your Wallet’ in order to access your wallet and execute transactions.


Execute a transaction
In the section ‘Send Ether & Tokens’, you can create transactions by following the below steps.
-
Generate a transaction
• ‘To Address’;
• ‘Amount to Send’;
• le type de cryptomonnaies que vous souhaitez envoyer.
• 'Gas Limit' (rempli automatiquement). -
Confirm the transaction
-
Send transaction
How to use Trezor with MyCrypto
-
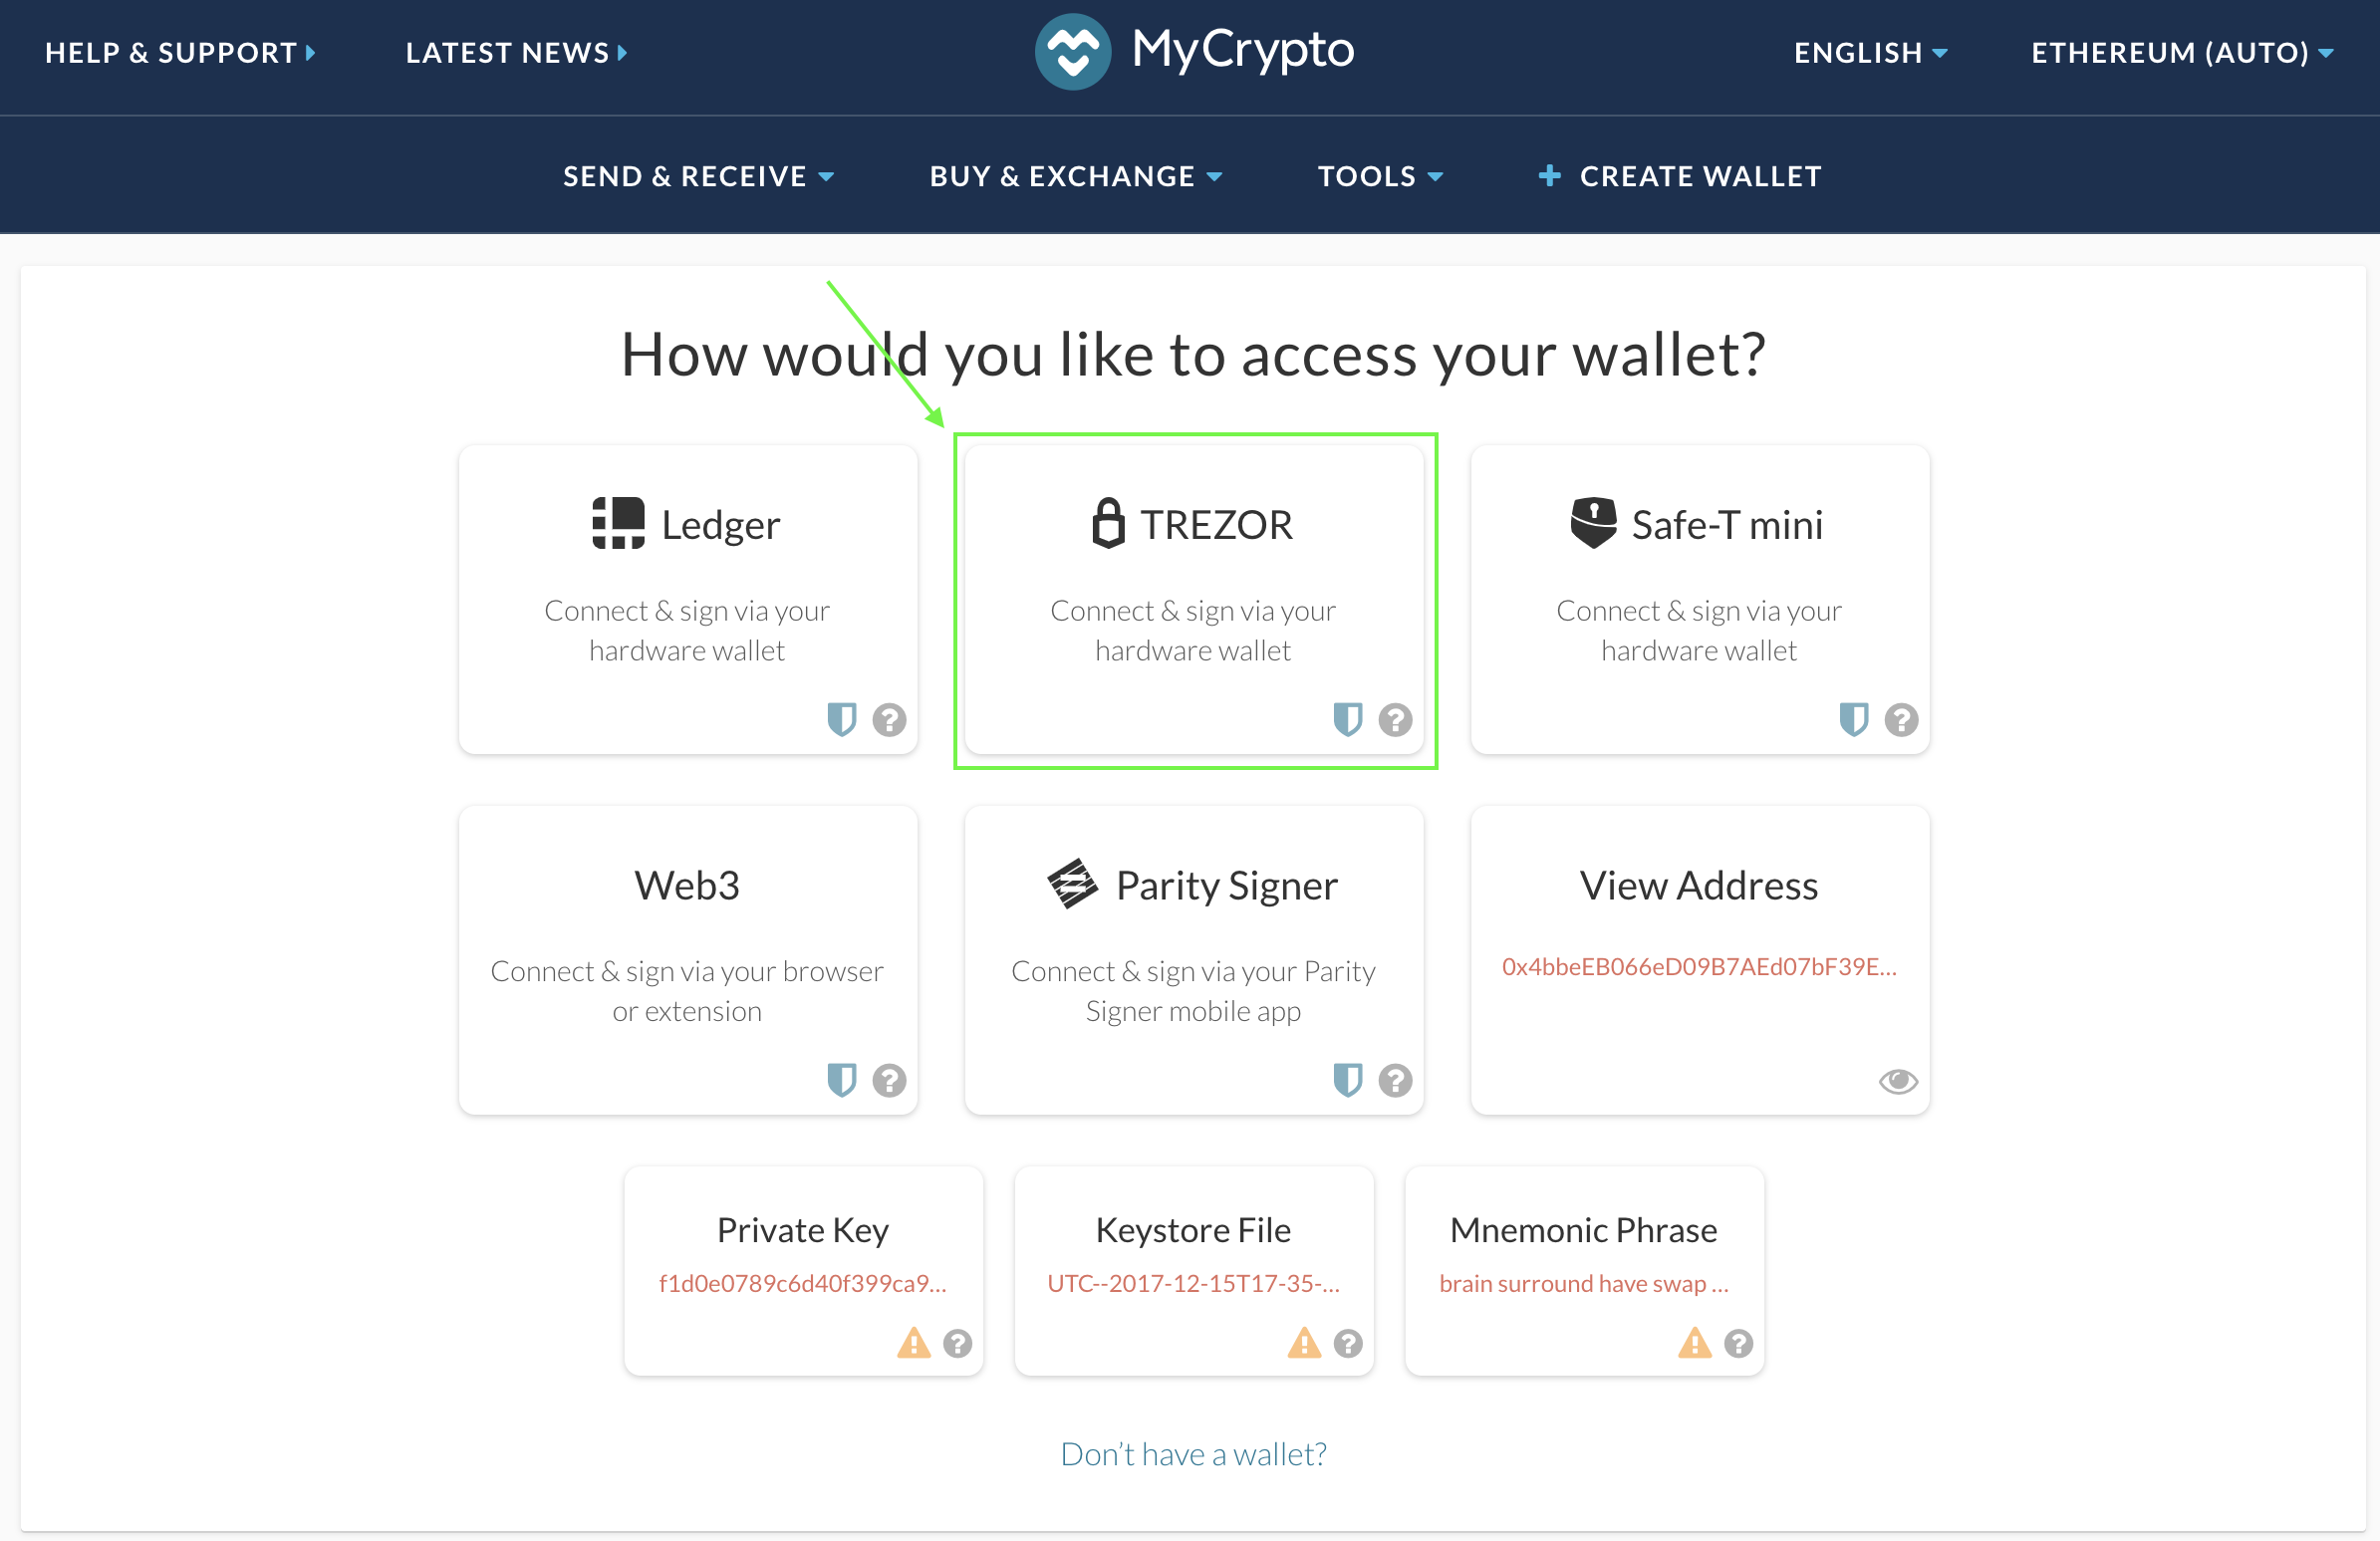
MyCrypto
-
Confirm notifications
Sélectionnez ensuite l'option permettant à TREZOR d'accéder à votre portefeuille numérique.

-
Select option TREZOR
-
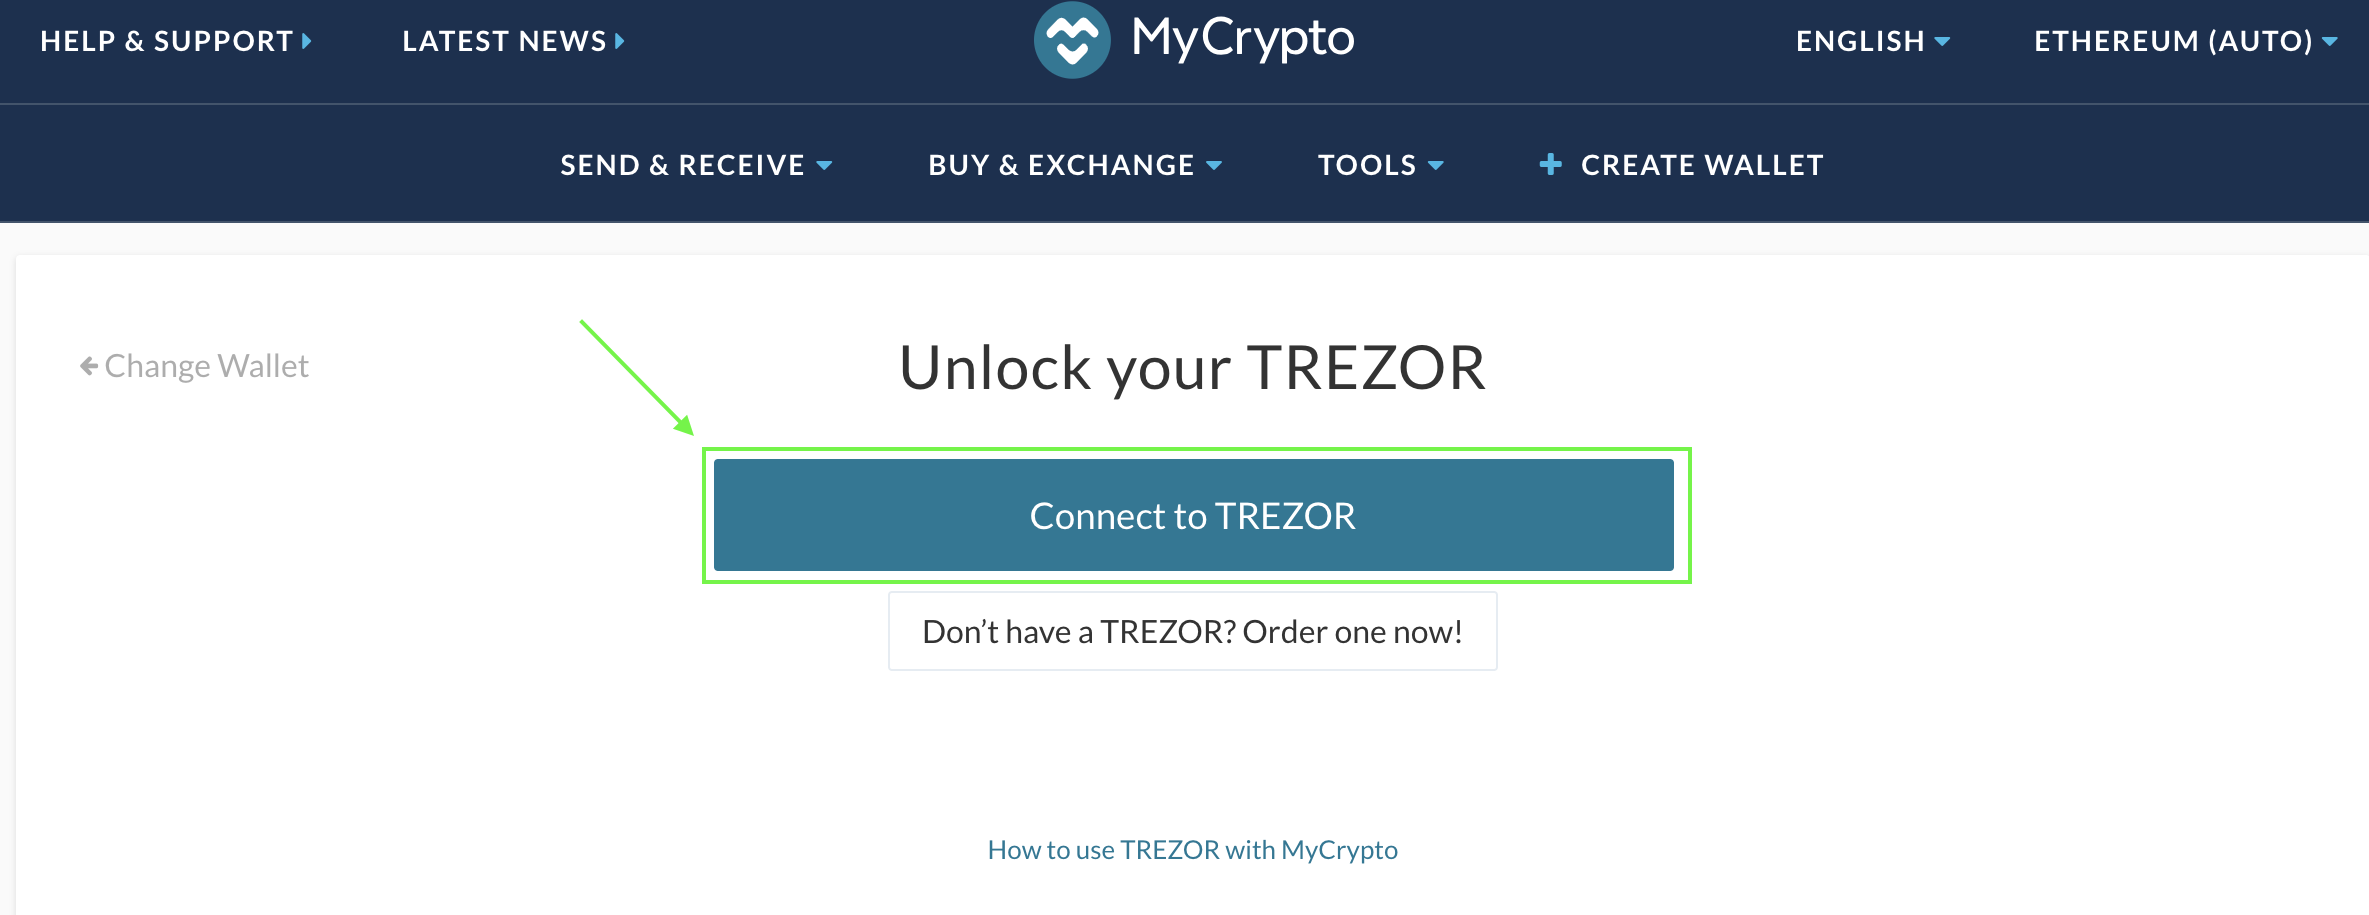
Connect to Trezor
-
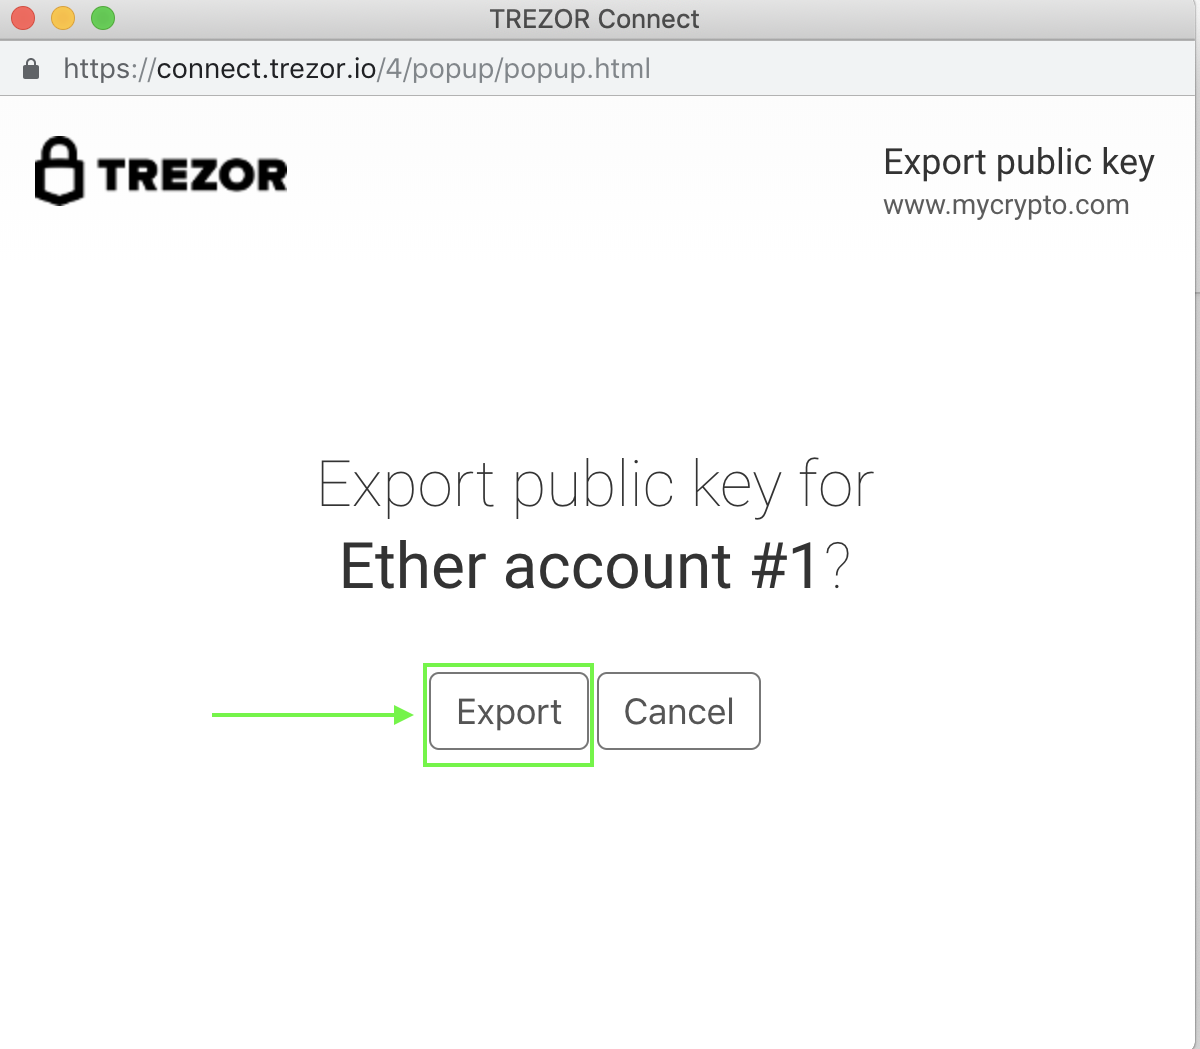
Export
-
Select
-
Send

If your balance is 0, you will of course need to first receive some Ether or ERC-20 tokens on that particular address.
In order to see your ERC-20 tokens on that address, click on the blue button ‘Scan For Tokens’ in the bottom right corner and select the relevant ERC-20 tokens (click on ‘Click to Load’).


Execute a transaction
In the section ‘Send Ether & Tokens’, you can create transactions by following the below steps.
-
Generate a transaction
-
Confirm the transaction
Trezor Connect vous demande ensuite de confirmer la transaction sur votre appareil TREZOR. (Votre TREZOR a déjà été déverrouillé lors de la phase précédente.) Confirmez la transaction sur votre appareil TREZOR.
-
Send the transaction
ORDER YOUR HARDWARE WALLET TODAY TO SECURE YOUR CRYPTOCURRENCY

Cryptohardware.be
Business information
Genesis Block BVBA
Avenue Winston Churchill 220
1180 Uccle
Belgium
BTW: BE0685844735